Earlier this month we had the opportunity to meet up with one of our best friends while she traveled through some of the state parks during the Government Shutdown. She was determined to go through with her trip in order to assist with some of the clean-up, bringing trash bags to clean any waste she found while making sure that she left no trace behind.
We knew we could help out, and knew we couldn’t miss the opportunity to catch-up, so we packed our weekenders and headed down to a hotel in Twentynine Palms, CA, for our little adventure!
Tips and tricks!
With the shutdown now coming to a close (hopefully), the parks will slowly resume charging their entrance fee as well as staffing and ensuring the parks are in full working, and rule-abiding, order. While this wasn’t the case during our trip, a lot of these tips will still apply!
#1 Mornings are less crowded
While it may be hard to get up at the crack of dawn, being able to watch the sunrise spread its rays out across the park is a breathtaking sight that I would recommend to everyone.
Not only that, but it means you won’t have as long (if any) of a wait at the entrance of the park and won’t have to fight for parking at the spot you’re heading to! Plus, taking photos of the park empty means you won’t have to edit out all the people in that shot you really like once you get back home~
#2 There are multiple entrances

When we visited the park, the West Entrance Station (out of Joshua Tree, top left) was backed up at the ranger station and took us a while to enter the park, but, to be fair, it was also staffed while the other entrances were not. However, it does appear to be the main entrance. If you do encounter a lot of people, don’t fret! You can always drive further into the park before making your first stop.
There are plenty of pull off locations that you can lock-up your car and go on walks to grab some pictures but the ones closest to the entrance are where most people try to stop (we were guilty). If the park is really busy, I would recommend heading closer to the first campsite before pulling off, then you can hopefully find an open parking spot and you’re close to the bathroom in case the urge hits.
However, if you find a spot you really want to stop at, then do it! Even though the general landscape is the same throughout the park, I managed to take multiple photos at each stop because of the way the mountains, hills, and trees changed so drastically through our drive. It’s especially fun when parts of the park are in fog!
If you want to do just that main loop, though, you can go to the North Entrance Station in Twentynine Palms and work your way back to the West Entrance at Joshua Tree. This way was practically deserted for us and meant we ended up going opposite to what most of the visitors were doing. Plus, the drive is a bit shorter to get to some of the main hiking spots!
#3 Bring water and snacks
When we did our morning hike at Ryan Mountain, I ended up killing off an entire refillable bottle of water and half a pack of jerky by the time we were comfortably back in the car and moving on to our next stop. I’m just glad that our friend was prepared because I only brought water!
No matter how dreary or how little time you expect to spend in the park, please remember to bring plenty of water and snacks to keep you going. You can easily expend more energy going on a hike, even if it is relatively flat, because you’re distracted by the scenery around you. The last thing you want on a vacation is getting dehydrated in the middle of a national park – the cell service isn’t the best and it’ll take quite a while to get somewhere to refuel. As far as I can tell, you’ll need to repay every time you re-enter the park which can really add up – in both time and money!
#4 Wear layers
While the temperature was relatively cool when we went in January, hiking can make you work up a sweat despite the chill of climbing a mountain! I definitely recommend a scarf to cover your neck and a windbreaker with a thinner top underneath. That way you can unzip your jacket to cool off and zip up when you need it.
#5 Leave no trace
Please be prepared to carry all trash with you. Leaving any type of food waste out in the park can bring animals closer to trails and the last thing anyone wants is to meet a rattlesnake or coyote trying to find a snack.
Keeping a trash bag in your vehicle will make this easier so you don’t have to carry it around all day while looking for a trash bin (they tend to have large bins around campsites!) and you can easily dump the entire bag in a bin later in the day when you’re planning to head out.
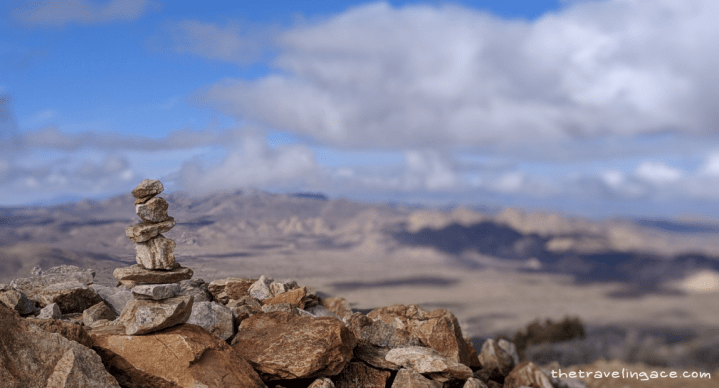
This also means to not create cairns, or stacked rocks, along trails! Not only does this disrupt the natural ecosystem, but the cairns are used as a way to map trails. If you build them willy-nilly then you could accidentally lead someone off the path and leave them at risk of hurting themselves on a trail that isn’t actually part of the park.
If you see them around, snap a pic and enjoy them, but don’t add to them.
#6 Make sure your vehicle is fueled up
The park is fairly large and, due to the area, a lot of close gas stations tend to hike prices to get the tourists that forget to fuel up. Also, you never know what could happen, so keeping a relatively full tank will ensure that you’re ready to go, no matter what.
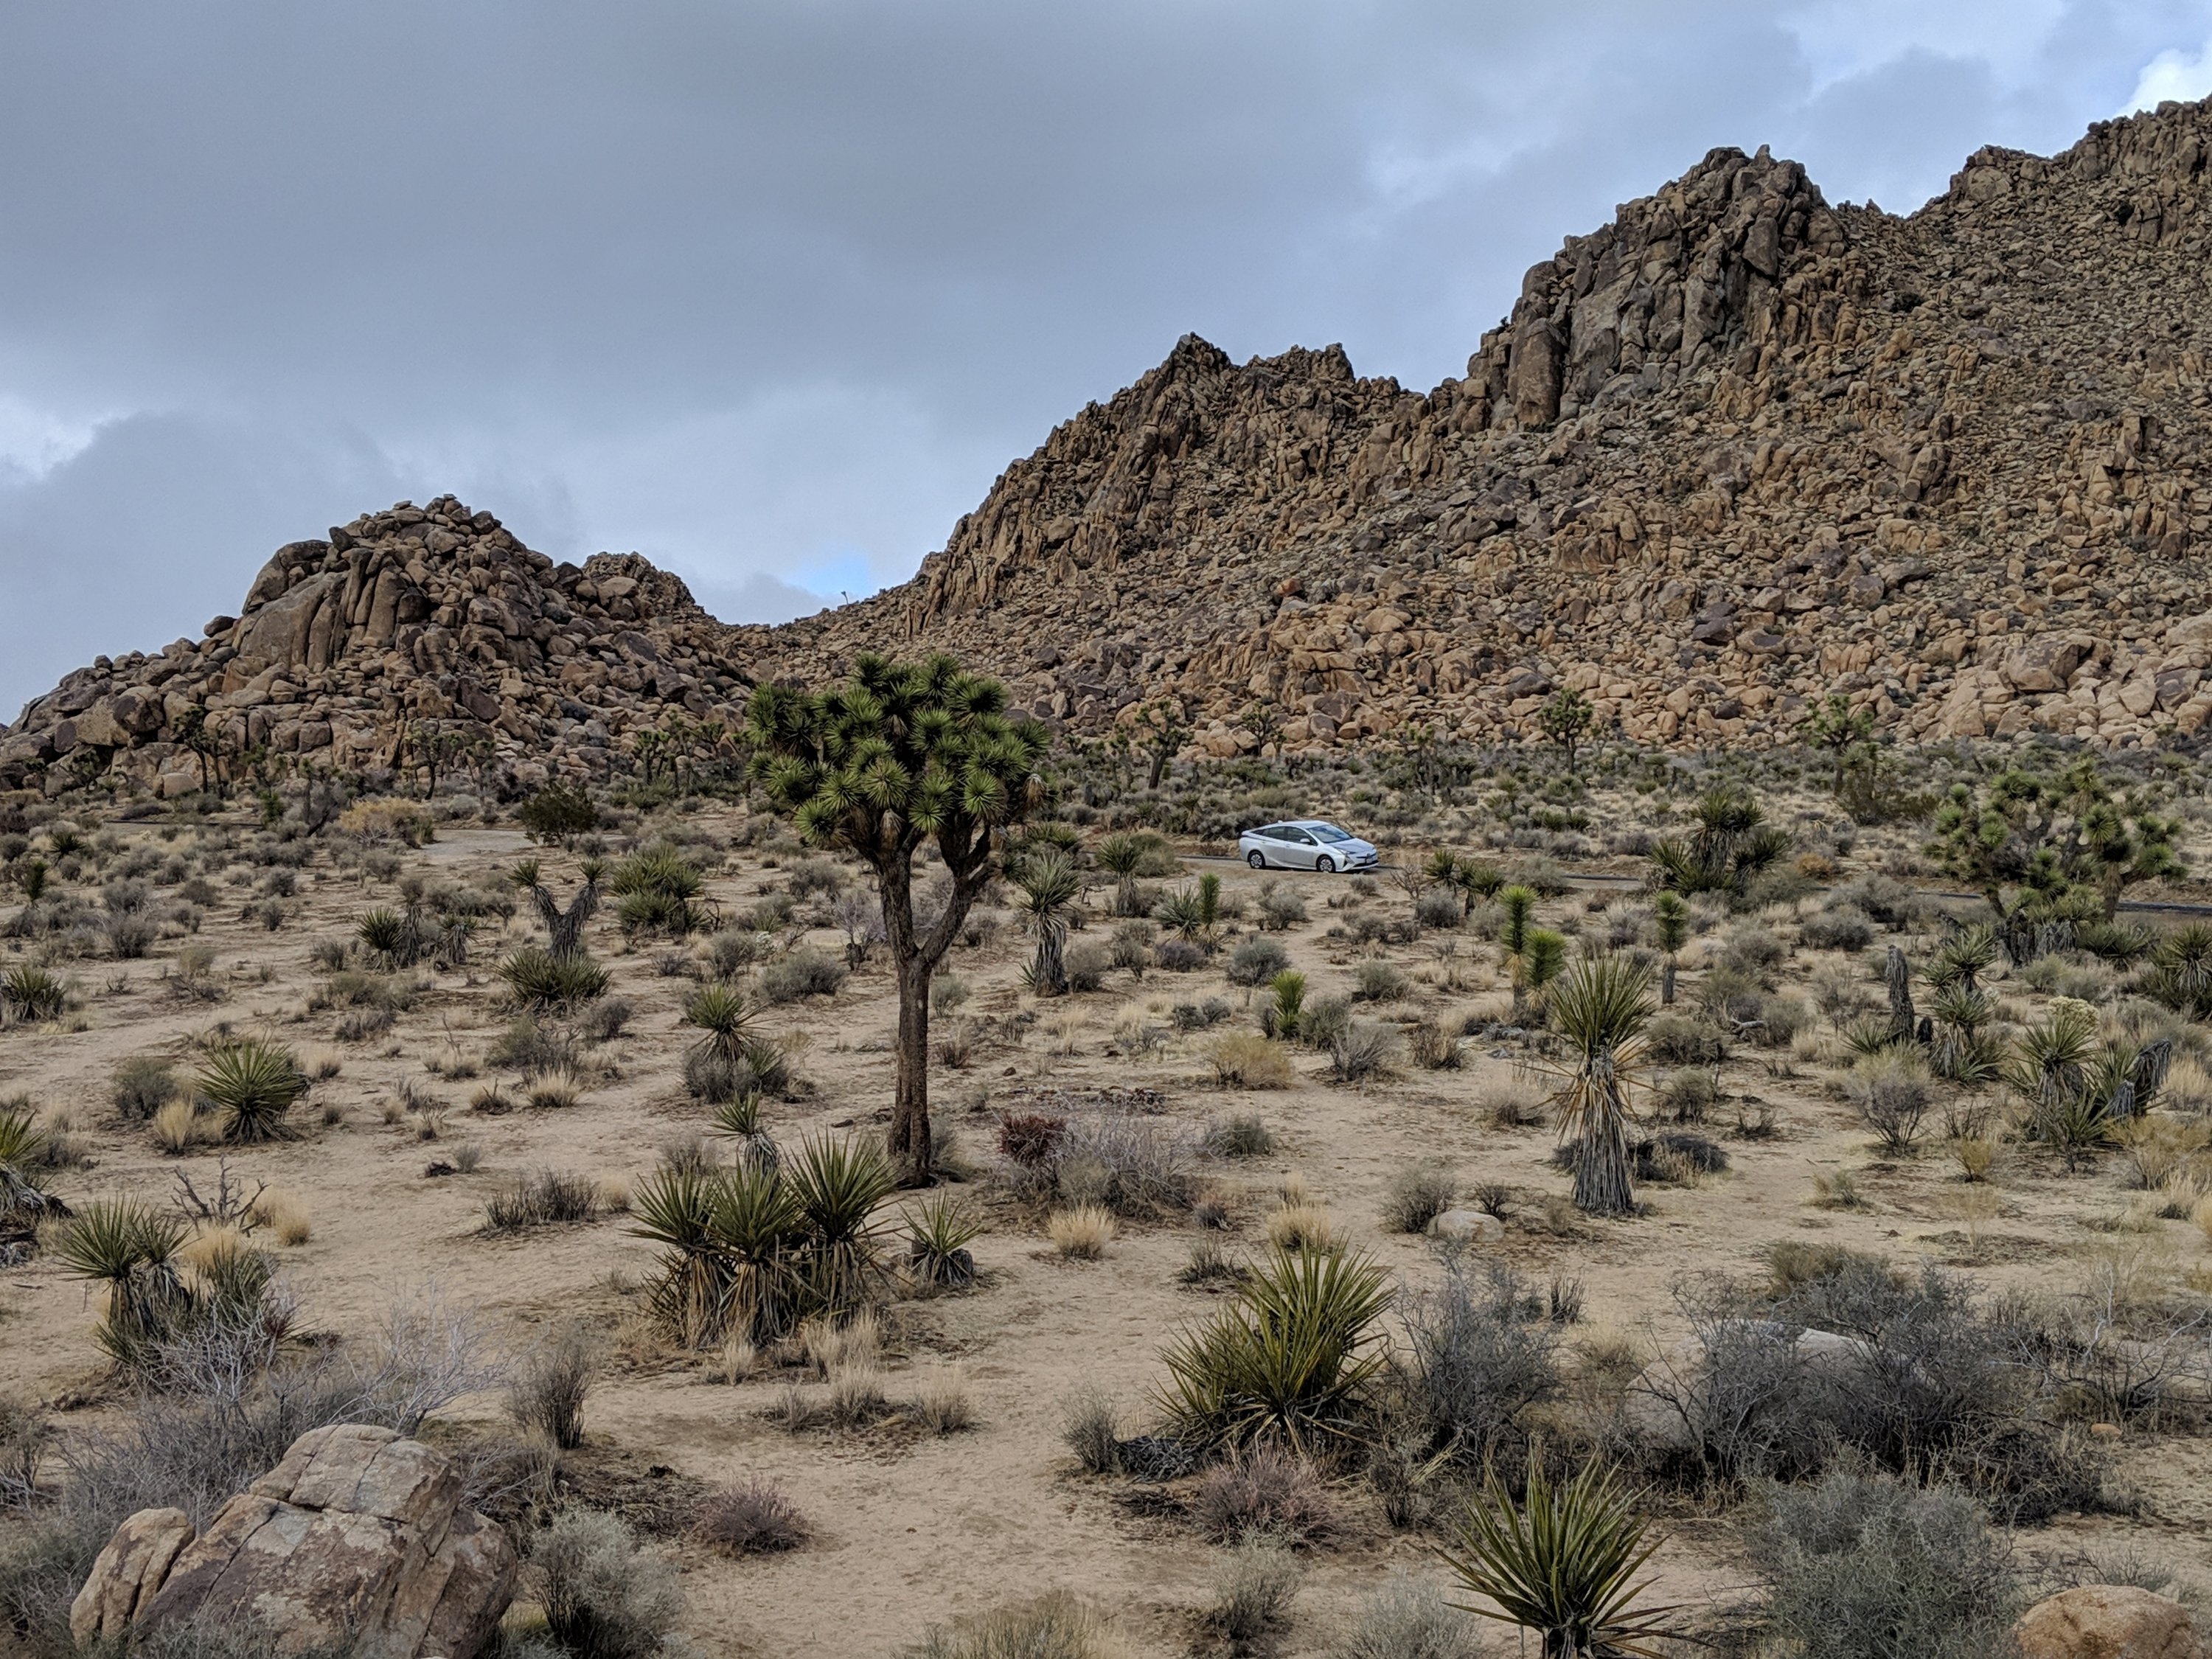
We drove my wife’s Prius Hybrid through the park and had no trouble since her vehicle easily gets 50 miles to the gallon. Plus the vehicles quiet nature meant it was easy to roll down the windows and really enjoy the serenity of the park.
#7 Bathrooms
Located at the different campsites scattered through the park, definitely keep them in mind and make sure to hit them before you’re off in the middle of a trail. While a lot of them have plenty of toilet paper, taking your own would be a great just-in-case thing to have. Also, make sure you have plenty of hand sanitizer, as we didn’t find any sort of hand-washing station at any of the toilets we stopped at.
#8 Buddy up
This park has great bouldering and rock climbing trails, but it’s always best to have a buddy to watch you and ensure you get help if anything goes wrong. Since human bodies tend to have the durability of an iPhone, you never know if a wrong step could lead to a twisted ankle or if you’d be perfectly fine. Plus, hiking with someone means you can talk through the exhaustion 😉
#9 No/Low cell service
We lost cell service pretty quickly, but GPS seemed to work just fine. The only time we had service in the park was when we were at the 5,457 ft summit (so let your grumpy kid/friend know they can get reconnected if they climb, it may give them some motivation~)
A trick that I love to do for traveling is downloading an area’s offline map in Google Maps. Then you can leave your data off and use your phone’s location/GPS service to see where you are! (This can also keep the data charge down if you use location a lot around your hometown area – looking at you, Pokemon GO!)
- Go into the Google Maps app and tap the menu button on the top left (beside ‘Search here’)
- On the menu it brings up, there will be an option for ‘Offline maps‘, tap that
- Tap ‘Select Your Own Map‘.
- This will bring up the area you are currently at (if location enabled) or your home area if not.
- Pinch to zoom out, move the map to the location you want, and tap ‘Download‘
- the app shows you how much space the offline map will take so you know before you save it
- Then you can name it and it will show up under the ‘Offline Maps’ Downloaded Maps section!
- These maps do require updating over time, but this ensures you have the latest data!
- If you don’t need the map anymore, tap on the map name you want to remove (see step 5)
- On the new screen, tap ‘Delete‘ then ‘Yes’ to confirm
This trick also works great overseas, as I used the same trick to get us around Ireland and Scotland! Make sure you also turn on airplane mode to ensure no data is transferred. While it’s not always perfect, Google Maps tends to be updated constantly so we were able to get around easily without worrying about an overseas charge showing up on our phone bill 🙂
Pics!
Let me know what you think of my tips and if you have any of your own!
Bare with me as I get my blog up and running. I’ve been making a few changes and can’t wait to hear your feedback~
Until our next adventure, Sam
